Have you ever found yourself in a situation where you’re craving a homemade dish that requires a perfectly mixed batter, but unfortunately you don’t have a food processor? Don’t despair! There are actually several handy alternatives you can use to achieve that same delicious result. Whether it’s baking a cake, making dough, or whipping up a creamy sauce, this article will show you the creative ways to mix your ingredients without a food processor. Get ready to roll up your sleeves and embrace the joy of manual mixing!
CHECK OUT FOOD PROCESSORS AND VEGETABLE CHOPPERS ON AMAZON
Blenders
Blenders are a versatile and convenient kitchen appliance that can be used for a variety of tasks. Whether you’re making smoothies, soups, or even salsa, a blender can help you achieve the desired consistency and blend ingredients together seamlessly.
Using a Blender
Using a blender is a straightforward process that begins with assembling your ingredients. Start by adding the liquid ingredients to the blender first, followed by the solids. This helps ensure proper blending and prevents any splattering.
Next, securely attach the blender lid and place the blender jar onto the base. It’s important to always use a proper seal to prevent any leaks or spills. Once everything is assembled, choose the appropriate blending speed for your recipe and turn the blender on.
During the blending process, it may be necessary to stop and scrape down the sides of the blender jar with a spatula. This helps ensure that all the ingredients are evenly mixed and blended. Finally, once you’ve achieved the desired consistency, pour or scoop out your mixture from the blender jar and enjoy your culinary creation.
Tips for Mixing with a Blender
To make the most of your blending experience, here are a few tips to keep in mind:
-
Start with the liquid ingredients: Adding the liquid ingredients first ensures a smoother blending process.
-
Control the speed: Start with a slower speed to allow the ingredients to combine gradually. You can increase the speed as needed.
-
Experiment with pulsing: For recipes that require a more textured result, try pulsing the blender in short bursts instead of continuous blending.
-
Be mindful of hot ingredients: If you’re blending hot liquids, make sure to blend in small batches and leave some room for steam to escape to prevent any accidents.
Blender Recipes
Blenders can be used to create a wide range of delicious recipes. From refreshing smoothies to creamy soups, here are a few blender recipes to try:
-
Strawberry Banana Smoothie: Blend together fresh strawberries, ripe bananas, Greek yogurt, and a splash of orange juice for a refreshing and nutritious smoothie.
-
Roasted Red Pepper Soup: Combine roasted red peppers, vegetable broth, onion, garlic, and spices in a blender. Blend until smooth and then heat on the stovetop for a comforting and flavorful soup.
-
Homemade Salsa: Blend together tomatoes, onions, jalapenos, garlic, cilantro, lime juice, and salt for a homemade salsa that pairs perfectly with tortilla chips or as a topping for tacos.
CHECK OUT FOOD PROCESSORS AND VEGETABLE CHOPPERS ON AMAZON
Handheld Mixers
Handheld mixers can be a helpful tool when you need to mix ingredients but don’t have access to a food processor. These compact and easy-to-use devices are especially handy for bakers looking to whip up batters, frosting, or dough.
Mixing with a Handheld Mixer
Using a handheld mixer is a convenient way to mix ingredients together without the need for a bulky machine. Start by selecting the appropriate attachments for your desired mixing task. Most handheld mixers come with beaters for general mixing and dough hooks for kneading dough.
Before you begin, ensure that your ingredients are properly measured and prepped. Place the ingredients in a deep mixing bowl, then insert the beaters or dough hooks into the handheld mixer. Securely attach the appropriate attachment by pushing them into the mixer until they lock in place.
Now, it’s time to start mixing. Hold the handheld mixer firmly with one hand and turn it on to the desired speed setting. Slowly immerse the beaters or dough hooks into the ingredients, gently guiding them through the mixture as it starts to blend. It’s important to start at a low speed to prevent any splattering, gradually increasing the speed as the ingredients combine.
Once the mixture is well-mixed and reaches the desired consistency, you can turn off the handheld mixer and remove the attachments from the device. Remember to turn off and unplug the mixer before removing the beaters or dough hooks.
Proper Techniques for Using Handheld Mixers
To ensure successful mixing with a handheld mixer, here are some techniques to keep in mind:
-
Use a deep mixing bowl: This helps prevent any splattering or spills while mixing ingredients.
-
Start at a low speed: Begin mixing at a low speed to prevent ingredients from flying out of the bowl and gradually increase the speed for thorough mixing.
-
Tilt the handheld mixer at an angle: By tilting the mixer at a slight angle, you allow the beaters or dough hooks to better incorporate air into the mixture, resulting in lighter and fluffier batters.
-
Be patient with dough: When kneading dough with handheld mixers, it’s important to let the machine do the work. Avoid applying too much pressure or overmixing, as this can lead to tough or dense dough.
Handheld Mixer Recipes
Handheld mixers can be used to create numerous delectable recipes. Here are a few recipes that you can easily whip up using a handheld mixer:
-
Classic Chocolate Chip Cookies: Cream together butter, sugar, and brown sugar until light and fluffy using the handheld mixer. Add eggs and vanilla extract, then gradually mix in flour, baking soda, and salt. Stir in chocolate chips and bake for chewy and delicious cookies.
-
Fluffy Whipped Cream: Beat cold heavy cream, sugar, and vanilla extract using the handheld mixer until soft peaks form. Serve with your favorite desserts like pies, cakes, or fresh fruit.
-
Homemade Pizza Dough: Mix together warm water, yeast, sugar, and olive oil in a bowl. Gradually add flour and salt, mixing with the handheld mixer until a dough forms. Knead the dough by hand and let it rise before shaping into a pizza crust.
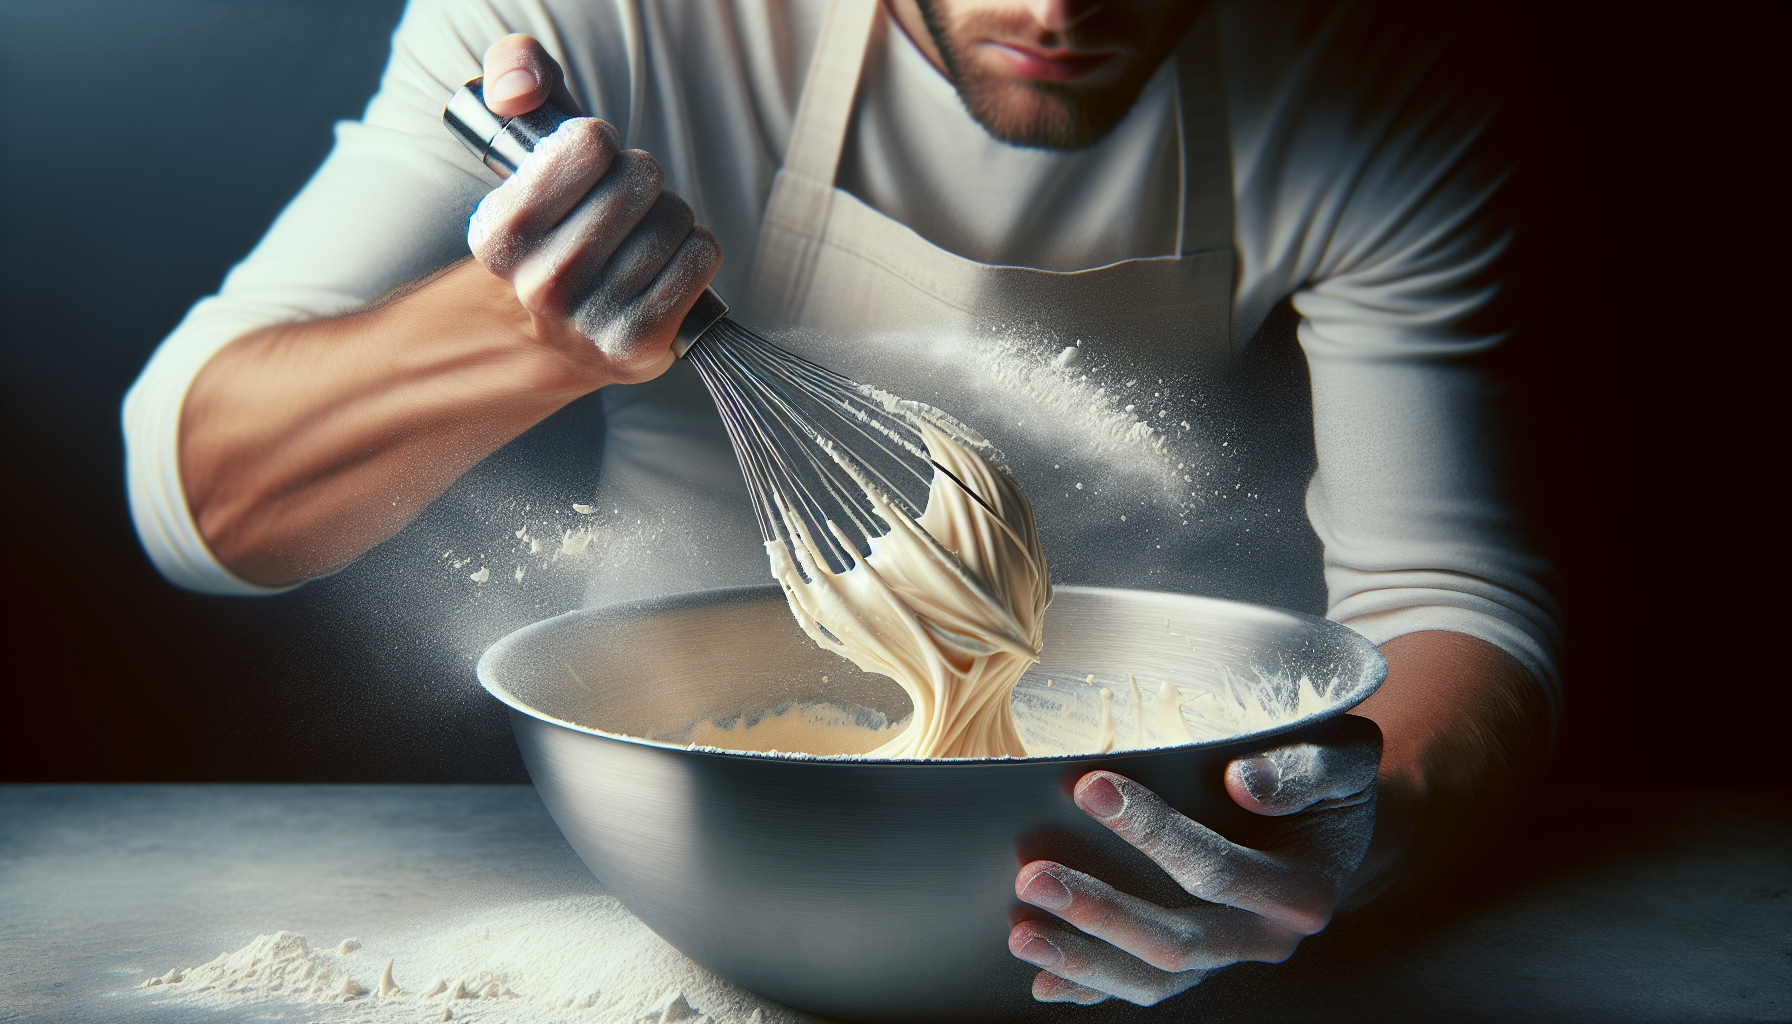
Whisks
Whisks are a kitchen essential for any home cook or baker. These simple yet effective tools help mix, emulsify, and incorporate air into various recipes. From creating fluffy meringues to perfectly mixed vinaigrettes, a whisk is a versatile tool that can elevate your culinary creations.
Mixing with a Whisk
Using a whisk is a manual mixing technique that requires a bit of arm power but yields excellent results. It’s simple to use and can be used in a variety of recipes.
Start by choosing the appropriate whisk size and type for your recipe. Whisks come in different sizes and shapes, including balloon whisks for incorporating air, flat whisks for stirring and scraping, and French whisks for delicate tasks like making custards.
Once you have your whisk ready, place the ingredients in a mixing bowl and use a circular or figure-eight motion to combine them. This helps ensure all the ingredients are fully mixed, with no lumps or inconsistencies. If you’re working with a larger quantity of ingredients, you can also use an up-and-down motion to incorporate air and create a lighter texture.
Continue whisking until the mixture reaches the desired consistency. It may take a bit of practice to achieve the perfect technique for your recipe, but with time and patience, you’ll become a whisking pro.
Types of Whisks and Their Uses
There are several types of whisks available, each designed to serve a specific purpose. Here are a few common types of whisks and how they can be used:
-
Balloon Whisk: This whisk has a rounded shape with wires that form a balloon-like structure. It’s perfect for whisking air into batters, whipping cream, or making meringues.
-
Flat Whisk: With its flat, elongated shape, this whisk is ideal for stirring and scraping the bottom of pans. It’s commonly used for making sauces, gravies, and custards.
-
French Whisk: This whisk features a long, narrow shape with wires that are closer together. It’s ideal for tasks that require gentle mixing, such as making custards or tempering eggs.
Whisk Recipes
Whisks can be used to create a wide range of recipes, from sweet treats to savory dishes. Here are a few delicious recipes that you can try using a whisk:
-
Fluffy Pancakes: Whisk together flour, sugar, baking powder, salt, milk, eggs, and melted butter until smooth and well-combined. Cook the batter on a hot griddle or skillet, flipping the pancakes when bubbles form on the surface.
-
Homemade Salad Dressing: In a mixing bowl, whisk together olive oil, vinegar or citrus juice, Dijon mustard, honey, salt, and pepper until emulsified. Pour over your favorite salad mix and toss for a fresh and flavorful dressing.
-
Lemon Meringue Pie: Whisk together egg yolks, sugar, cornstarch, water, and lemon juice in a saucepan. Cook over medium heat, whisking continuously until the mixture thickens. Pour the filling into a pre-baked pie crust, then top with whipped egg whites and bake until golden brown.
Forks or Knives
Sometimes, you find yourself in a situation where you need to mix ingredients but don’t have access to traditional mixing tools. In times like these, forks or knives can come to the rescue, offering a simple and effective way of achieving the desired consistency.
Mixing with a Fork
Using a fork as a mixing tool can be a handy trick when you don’t have access to a blender or whisk. It’s particularly useful for small batches or tasks that don’t require intense mixing.
To mix with a fork, start by placing the ingredients in a bowl or on a cutting board. Hold the fork firmly in one hand and use the tines to press and combine the ingredients. You can use an up-and-down motion or a circular motion, depending on the texture you desire.
Mixing with a fork may require a bit more effort and time compared to using specialized tools, but it can still yield satisfactory results, especially for simpler recipes.
Mixing with a Knife
A knife may not be the most conventional mixing tool, but in certain situations, it can get the job done. Mixing with a knife is especially useful for tasks like cutting butter into flour or combining ingredients for a crumble topping.
To mix with a knife, start by placing the ingredients on a cutting board or in a bowl. Use the edge of the knife to press and cut through the ingredients, breaking them into smaller pieces. Gradually incorporate the ingredients together by repeatedly chopping and folding them with the knife.
While mixing with a knife may require a bit more precision and control, it can still be an effective alternative when other tools aren’t available.
Techniques for Mixing with Forks or Knives
When using forks or knives for mixing, there are a few techniques and tips to keep in mind:
-
Use a steady hand: Maintain a firm grip on the fork or knife and apply consistent pressure to effectively mix the ingredients.
-
Incorporate air: If your recipe requires a lighter texture, use a motion that incorporates air into the mixture, such as lifting the fork or knife and gently folding the ingredients.
-
Be patient: Mixing with forks or knives may take a bit longer compared to using specialized tools. Take your time, and ensure all the ingredients are evenly combined.
-
Adjust the technique: Depending on the recipe and desired texture, you may need to experiment with different mixing techniques using forks or knives. Feel free to adapt and adjust the motions to achieve the best results.
Mashing
Mashing is a technique used to create smooth and creamy textures by breaking down ingredients into a soft consistency. Commonly associated with mashed potatoes, this method can also be used for other ingredients such as fruits, vegetables, or legumes.
Mashing Technique
The mashing technique involves using a utensil or tool to apply pressure and break down the ingredients. The desired result can range from chunky to completely smooth, depending on personal preference and the recipe.
To mash ingredients, start by selecting the appropriate utensil or tool. Common options include a potato masher, a fork, or even a blender for a smoother result.
Place the ingredients in a bowl or on a cutting board, then use the chosen utensil to press down and break up the ingredients. Continue mashing until the desired consistency is achieved. For a chunkier texture, mash the ingredients less, leaving some small pieces intact. For a smoother result, apply more pressure and mash until the mixture is uniform and free of lumps.
Tools for Mashing
There are various tools available for mashing, each suited for different ingredients and textures. Here are a few commonly used tools for mashing:
-
Potato Masher: This tool features a flat bottom with small holes or wires. It’s perfect for mashing cooked potatoes, root vegetables, or even beans.
-
Fork: In a pinch, a fork can be used to mash ingredients. It’s particularly useful for smaller quantities or for achieving a chunkier texture.
-
Blender or Food Processor: Although not traditional mashing tools, blenders or food processors can be used to create a smoother texture by rapidly breaking down the ingredients.
Recipes Utilizing Mashing Method
The mashing method is versatile and can be used in a variety of recipes. Here are a few recipe ideas that utilize this technique:
-
Creamy Mashed Potatoes: Boil peeled and diced potatoes until tender, then drain and return them to the pot. Mash the potatoes with butter, milk, salt, and pepper until smooth and creamy. Serve as a comforting side dish.
-
Guacamole: Mash ripe avocados with a fork until smooth but still slightly chunky. Mix in diced tomatoes, onions, jalapenos, lime juice, cilantro, and salt for a delicious homemade guacamole.
-
Bean Dip: Mash cooked beans with a potato masher or fork. Season with spices like cumin, paprika, garlic powder, and salt. Serve as a flavorful dip with tortilla chips or as a spread on sandwiches.
Hand Kneading
Hand kneading is a traditional method used in bread-making and dough preparation. It involves manually working the dough to develop gluten, which gives bread its desirable texture and structure. While it requires some physical effort, hand kneading allows you to connect with the dough and understand its consistency better.
Kneading by Hand
To knead dough by hand, follow these steps:
-
Prepare the dough by combining the necessary ingredients according to your recipe.
-
Lightly flour a clean surface, such as a countertop or cutting board, to prevent the dough from sticking.
-
Place the dough on the floured surface and use the heels of your hands to push it away from you.
-
Fold the dough in half towards you, rotate it a quarter turn, and repeat the pushing motion.
-
Continue this process of pushing, folding, and rotating for about 8-10 minutes. The dough should become smooth and elastic.
-
If the dough feels too sticky, gradually add small amounts of flour to prevent it from sticking to your hands or the surface.
-
Once the dough is properly kneaded, shape it into a ball and let it rest according to your recipe’s instructions.
Proper Techniques for Hand Kneading
Hand kneading requires good technique to achieve the best results. Here are some tips to help you knead dough effectively:
-
Use body weight: Apply even pressure with the heels of your hands, using your body weight to push the dough away from you. This helps develop gluten and gives the dough its structure.
-
Rotate the dough: By rotating the dough a quarter turn after each push, you ensure that all sides are evenly kneaded.
-
Avoid over-flouring: While it’s important to prevent sticking, adding too much flour during the kneading process can result in a dense and dry final product. Use flour sparingly and add it gradually if needed.
-
Be patient: Kneading takes time, and it’s important not to rush the process. Take breaks if needed, but aim for the recommended kneading time to develop gluten properly.
Recipes Requiring Hand Kneading
Hand kneading is commonly used in bread recipes, resulting in delicious homemade loaves. Here are a few recipes that require hand kneading:
-
Classic Homemade Bread: Combine flour, yeast, salt, sugar, and water in a mixing bowl. Knead the dough by hand until smooth and elastic, then let it rise, shape it, and bake for a flavorful homemade bread.
-
Pizza Dough: Mix together flour, yeast, salt, sugar, olive oil, and water in a bowl. Knead the dough by hand until it’s smooth and forms a soft ball. Let it rise, then shape it into a pizza crust, and add your favorite toppings before baking.
-
Cinnamon Rolls: Prepare the dough by combining flour, yeast, sugar, salt, milk, butter, and eggs. Knead the dough until it becomes smooth and elastic, then let it rise. Roll out the dough, add a cinnamon sugar filling, roll it up, and slice into individual rolls. Bake until golden brown, then drizzle with cream cheese icing.
Grating
Grating is a culinary technique used to shred or finely mince ingredients into smaller pieces. It’s commonly used for vegetables, cheese, fruits, and even spices. Grating not only enhances the texture and appearance of dishes but also releases the flavors and aromas of the ingredients.
Grating Technique
To grate ingredients effectively, follow these steps:
-
Choose the right grater: There are various types of graters available, including box graters, microplane graters, and rotary graters. Select the appropriate grater based on the desired size and texture of your ingredient.
-
Prepare the ingredient: Wash and dry the ingredient thoroughly before grating. Remove any undesirable parts, such as stems or seeds.
-
Hold the grater securely: Place the grater on a stable surface, using one hand to hold the grater in place and the other hand to hold the ingredient.
-
Grate with gentle pressure: Apply light pressure while moving the ingredient up and down or back and forth against the grating surface. Be cautious of your fingers, and use the grating tool until only a small piece remains.
-
Collect the grated ingredient: As you grate, avoid pressing down too hard and causing the ingredient to become compacted. Allow the grated pieces to fall directly onto a plate or into a bowl.
-
Clean the grater: After grating, clean the grater to prevent any leftover bits from sticking. Use a brush or running water to remove any remnants.
Various Grating Tools and Their Uses
Graters come in different shapes, sizes, and designs, each suited for specific ingredients and textures. Here are a few commonly used graters and their uses:
-
Box Grater: This grater has four sides with different grating surfaces, including fine, medium, coarse, and slicer. It’s ideal for grating cheese, vegetables, and even zesting citrus fruits.
-
Microplane Grater: Microplane graters have small, sharp teeth that create very fine shreds. They are perfect for grating hard cheeses, spices, citrus zest, or ginger.
-
Rotary Grater: This grater consists of a handle and a drum with sharp blades. It’s great for grating large quantities of cheese, chocolate, or vegetables with minimal effort.
Recipes Incorporating Grating
Grating can add texture, flavor, and visual appeal to a wide range of recipes. Here are a few recipes that incorporate grating:
-
Carrot and Zucchini Muffins: Grate carrots and zucchini using a box grater, then mix them into the muffin batter for added moisture and nutrition.
-
Parmesan Crusted Chicken: Combine freshly grated Parmesan cheese with breadcrumbs and spices. Roll chicken breasts in the mixture and bake until golden and crispy.
-
Citrus Zest Cookies: Grate the zest of lemons, oranges, or limes using a microplane grater. Incorporate the zest into a cookie dough for a burst of citrus flavor.
Crushing
Crushing is a technique used to break down ingredients or transform them into a finer texture. Whether you’re crushing garlic cloves, crushing herbs to release their flavors, or crushing graham crackers for a pie crust, this method can be accomplished with a few simple tools.
Crushing Method
To achieve proper crushing, follow these steps:
-
Select the appropriate tool: Depending on the ingredient and desired texture, choose the appropriate tool for crushing. Common options include a mortar and pestle, a rolling pin, or the bottom of a heavy pan.
-
Prepare the ingredient: If necessary, peel or remove the undesirable parts of the ingredient. Clean and dry it thoroughly before crushing.
-
Place the ingredient on a sturdy surface: For easy crushing, place the ingredient on a clean and stable surface, such as a cutting board, countertop, or mortar.
-
Apply even pressure: Using the chosen tool, press down firmly on the ingredient and apply even pressure to break it down. This can be done by rolling, pounding, or grating the ingredient.
-
Continue until the desired consistency: Depending on the recipe and personal preference, continue crushing until the ingredient reaches the desired texture. It could be finely minced, roughly crushed, or completely pulverized.
Tools for Crushing
There are various tools you can use for crushing, each suitable for different ingredients and textures. Here are a few commonly used tools for crushing:
-
Mortar and Pestle: This traditional tool consists of a bowl-shaped mortar and a pestle used to crush and grind ingredients. It’s perfect for crushing herbs, spices, garlic, or even making fresh pesto.
-
Rolling Pin: A rolling pin can be used to crush ingredients by applying pressure while rolling it over the ingredient. It’s suitable for crushing crackers, cookies, or nuts.
-
Heavy Pan or Skillet: If a mortar and pestle or rolling pin are not available, you can use the bottom of a heavy pan or skillet to crush ingredients. Place the ingredient in a sturdy plastic bag or between two sheets of parchment paper to prevent any mess.
Recipes That Call for Crushing
Crushing ingredients can add depth of flavor and texture to various recipes. Here are a few recipes that call for crushing:
-
Homemade Pesto: Crush fresh basil leaves, garlic, pine nuts, Parmesan cheese, and olive oil using a mortar and pestle until a fragrant and flavorful paste is formed. Serve the pesto over pasta or as a spread on sandwiches.
-
Oreo Cheesecake: Crush Oreo cookies into fine crumbs using a rolling pin or a food processor. Mix the crushed cookies with melted butter, press into a pie dish, and chill. Fill with a creamy cheesecake filling for a delightful dessert.
-
Herb-Infused Olive Oil: Use a mortar and pestle to crush dried herbs, such as rosemary, thyme, or oregano, to release their aromas and flavors. Stir the crushed herbs into extra virgin olive oil and let it infuse for a few days. Use the flavored oil for salad dressings, bread dipping, or marinades.
Chopping
Chopping is a fundamental cooking skill that involves cutting ingredients into smaller, more manageable pieces. Whether you’re chopping vegetables for a stir-fry, chopping herbs for seasoning, or chopping nuts for a dessert, mastering this technique can greatly enhance your culinary endeavors.
Chopping Technique
To chop ingredients effectively, follow these steps:
-
Choose the right knife: Select a chef’s knife, Santoku knife, or any other knife with a sharp blade and comfortable handle. A sharp knife ensures clean and precise cuts.
-
Prepare the ingredient: Wash and dry the ingredient thoroughly before chopping. Remove any undesirable parts, such as stems, seeds, or peels.
-
Grip the knife properly: Hold the knife handle with a firm yet comfortable grip. Place your thumb and index finger on either side of the blade, known as the “pinch grip.”
-
Position the ingredient: Place the ingredient on a stable cutting surface, such as a cutting board. For smaller ingredients or precise cuts, consider using a sturdy pairing or utility knife.
-
Make the initial cut: Use the knuckle of your non-cutting hand as a guide and position it against the side of the ingredient. This helps maintain a consistent size and prevents accidental cuts.
-
Apply a rocking motion: While securing the ingredient with your non-cutting hand, use a rocking motion to move the knife up and down. Guide the knife with your fingertips, gradually moving through the ingredient to chop it into smaller pieces.
-
Repeat until desired size: Continue the chopping motion until the ingredient is evenly chopped into the desired size. Take your time to ensure consistent pieces and be mindful of your fingers throughout the process.
Different Chopping Tools and Their Functions
Various chopping tools are available, offering versatility and efficiency when working with ingredients. Here are a few commonly used chopping tools and their functions:
-
Chef’s Knife: This all-purpose knife features a wide blade and pointed tip, making it ideal for chopping vegetables, herbs, and meats.
-
Santoku Knife: Originating from Japan, this knife has a shorter and wider blade compared to a chef’s knife. It excels in slicing, dicing, and chopping tasks.
-
Paring Knife: Paring knives have a smaller, narrow blade. They are useful for precise and delicate tasks, such as peeling or chopping smaller ingredients.
Recipes Utilizing Chopping
Chopping is a fundamental technique used in countless recipes. Here are a few recipe ideas that incorporate chopping:
-
Vegetable Stir-Fry: Chop an assortment of vegetables, such as bell peppers, broccoli, carrots, and onions. Stir-fry them in a hot wok with your choice of seasonings and sauces for a quick and flavorful meal.
-
Fresh Herb Salad: Chop a variety of fresh herbs, such as parsley, cilantro, dill, or mint. Toss them together with a drizzle of olive oil, lemon juice, salt, and pepper for a refreshing salad.
-
Homemade Salsa: Chop tomatoes, onions, jalapenos, cilantro, and garlic into small pieces. Mix them together with lime juice, salt, and pepper for a delicious homemade salsa that pairs perfectly with tortilla chips or as a topping for tacos.
Mixing by Hand
Mixing by hand is a time-honored method that allows you to connect with your ingredients on a different level and achieve a unique texture in your culinary creations. While there are various tools available for mixing, sometimes a gentle touch and a good technique are all you need.
Proper Hand Mixing Techniques
When mixing by hand, here are some techniques to ensure the best results:
-
Use a gentle touch: Avoid exerting excessive force while mixing by hand. Apply a light touch and allow the ingredients to blend together naturally.
-
Circular or figure-eight motion: Use a circular motion or a figure-eight motion when mixing by hand. This helps incorporate the ingredients evenly and thoroughly.
-
Scrape down the sides: Occasionally stop mixing and use a spatula or a spoon to scrape down the sides of the bowl. This ensures that all the ingredients are properly mixed and prevents any pockets of unmixed ingredients.
-
Be mindful of texture: When hand mixing, it’s important to achieve the desired texture for your recipe. Mix until the ingredients are fully combined, but avoid overmixing, as this can lead to a dense or tough end result.
Recipes Suitable for Hand Mixing
Hand mixing can be a delightful way to create delicious recipes. Here are a few recipes that lend themselves well to hand mixing:
-
Chocolate Chip Cookies: Cream together butter and sugars until light and fluffy. Add eggs and vanilla extract, then gradually mix in the dry ingredients. Stir in chocolate chips by hand for a classic cookie dough.
-
Pancake Batter: Combine flour, sugar, baking powder, salt, milk, eggs, and melted butter. Mix gently by hand until all the ingredients are just combined. This helps create fluffy and tender pancakes.
-
Homemade Pasta Dough: Combine flour, eggs, and salt in a mixing bowl. Mix by hand until a dough forms, then knead until smooth and elastic. This helps develop gluten and ensures a perfect pasta texture.
In conclusion, when it comes to mixing without a food processor, there are various techniques and tools at your disposal. Whether you choose to use a blender, handheld mixer, whisk, fork, knife, masher, hand kneading, grating, crushing, or simply mix by hand, each method has its unique advantages and can help you achieve the desired results in your kitchen. So don’t be discouraged if you don’t have a food processor – with a little creativity and the right techniques, you can still create amazing dishes that are sure to impress! Happy mixing!